 flaticon.com
Boot Windows PE with Windows 7 AIK
Table of Contents
INTRO

Sometimes it’s necessary to troubleshoot and service a Windows OS while it’s offline. There are times where certain actions can only be performed while the filesystem the OS resides on is not being used or mounted like when it’s booted and running. If you’re familiar with Linux boot-discs, then Windows PE will be a simple concept to understand.
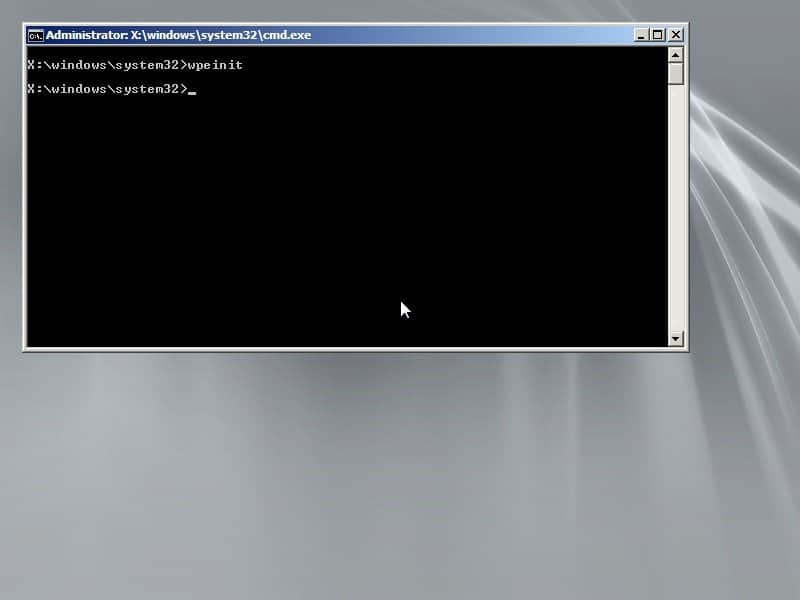
Windows PE is a very minimal OS that is booted on a computer via a CD/DVD or USB drive that Windows PE is written to. Windows PE at its base just boots into a Command Prompt window. This is where knowing your commands can be helpful. We can do many things with Windows PE. We can prepare hard disks, get access to files, run repair scans like chkdsk (Check Disk) and sfc (System File Checker), capture and apply images, and even utilize scripts to automate such tasks. Many of Microsoft’s troubleshooting articles require the use of Windows PE or reference it, so it’s handy to have around.
WINDOWS 7 AIK
In order to obtain the files for Windows PE and in this guide, we will be working with Windows PE 3.0, which is based on Windows 7 SP0 (Service Pack 0), we need to download and install Windows 7 AIK. Windows PE has several versions. For example, if we want a version of Windows PE based on Windows 8.1 with Update 1, then we need to download the “Windows Assessment and Deployment Kit (Windows ADK) for Windows 8.1 Update” package.
Then we must follow the instructions to prepare a build by reading the included help files with the package as I will show here with the “Windows Automated Installation Kit (AIK) for Windows 7” package.
Check links at the bottom of the page to get these files. Once downloaded, it will be an ISO image with a file name of “KB3AIK_EN.iso” which is over 1.7GBs in size. If you’re using Windows 8.1 or Windows 10, you can right-click “KB3AIK_EN.iso” and select “Mount”. This will mount the ISO as a virtual disc which is really what an ISO image file is. On Windows 7, you will need separate software not included in Windows to do so.
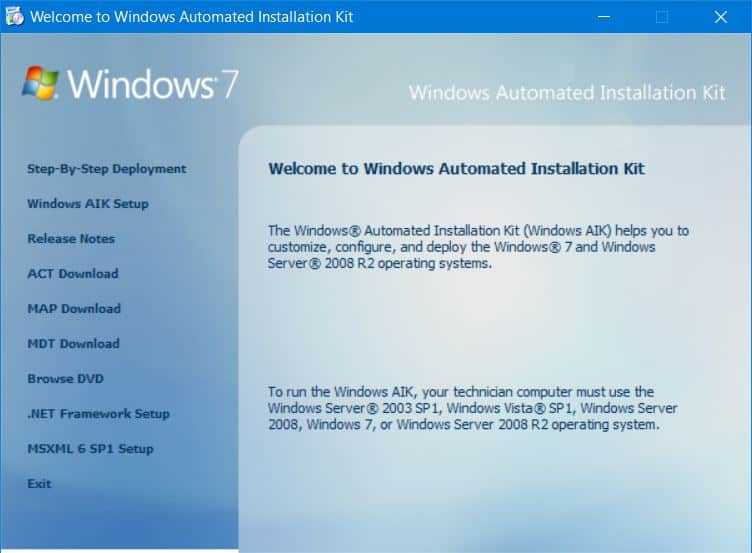
I like to use a program called “ImDisk Virtual Disk Driver” in that situation. Once you have the disc image mounted and you can view the contents, run “StartCD.exe”. Select “Windows AIK Setup” on the left like in the corresponding image shown and install Windows 7 AIK.
DOCUMENTATION
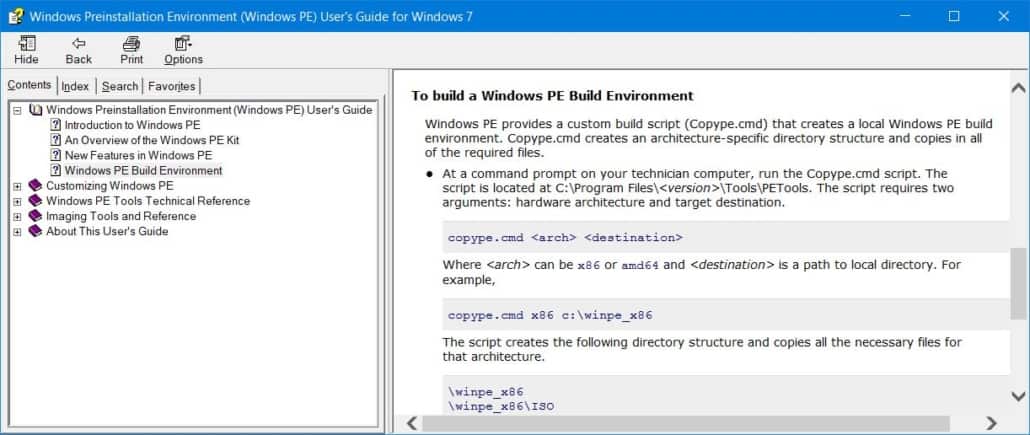
Now that we have Windows 7 AIK installed we are going to want to view the documentation on building the Windows PE environment. We can do this by navigating to the Start Menu and there should now be a new entry called “Microsoft Windows AIK” and under that we want to open the “Windows PE User’s Guide” or navigate to “C:\Program Files\Windows AIK\Docs\CHMs” and open “WinPE.chm”.
Then once opened expand the “Windows Pre-installation Environment (Windows PE) User’s Guide” node, then select “Windows PE Build Environment”. In this section of the documentation, we want to scroll down to the heading “To build a Windows PE Build Environment”. This part will get us started on how to prepare the source files for Windows PE. Also, at this time it may worth it to view the other sections and get more familiar with Windows PE.
OBTAINING SOURCE FILES
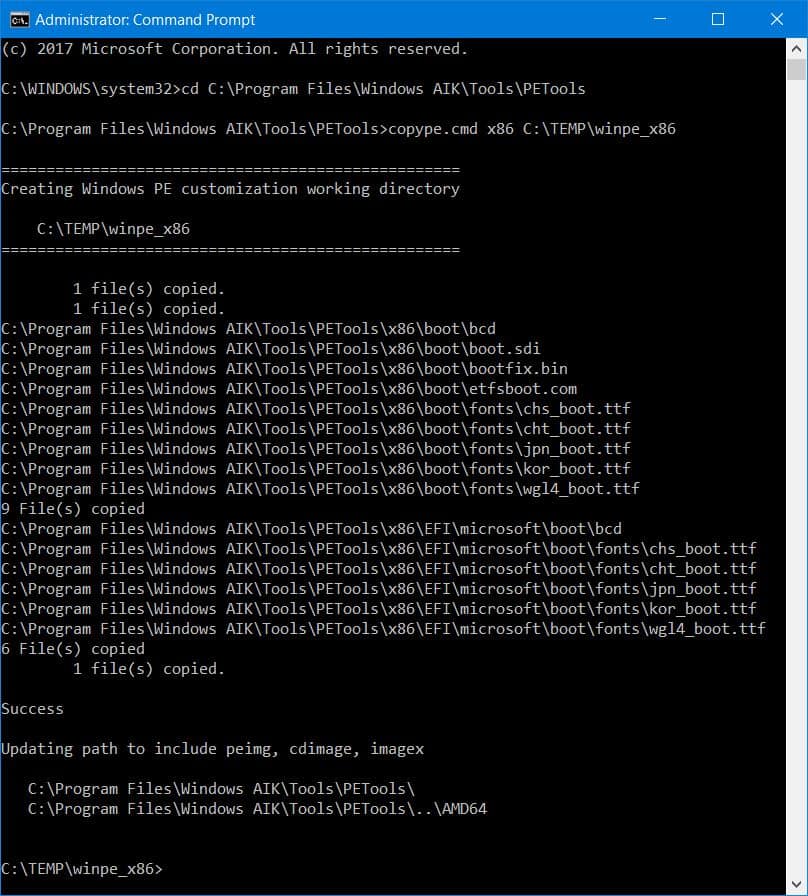
Open Command Prompt as Administrator and navigate to location of the “copype.cmd” script using the following command:
cd C:\Program Files\Windows AIK\Tools\PEToolsOnce in the PETools folder directory we must run the “copype.cmd” script with two arguments, which architecture we want, either “x86”, “amd64”, or “ia64” and the destination to place the files.
I created an x86 build and had the script copy the files to the “C:\TEMP\winpe_x86” folder; it will create the “winpe_x86” folder for me, using the following command:
copype.cmd x86 C:\TEMP\winpe_x86Once you hit enter, the output in Command Prompt should reflect the copy process as shown. Although we have the files we are going to need now, they’re not fully prepared yet. Let’s navigate to the destination folder of the files and take a look.
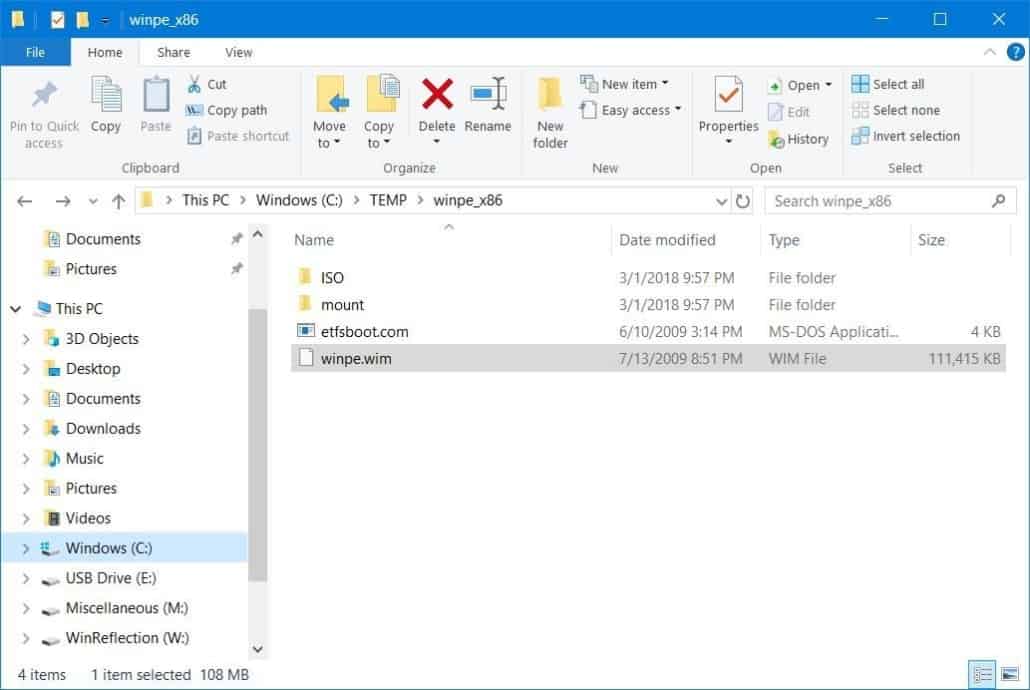
While the “copype.cmd” script has given us the files needed, we are missing the “boot.wim” file under the “winpe_x86\ISO\sources” folder. The “boot.wim” is the Windows PE image that will be booted into RAM. The file highlighted as shown called “winpe.wim” is the “boot.wim” we need.
It’s moved out of the “winpe_x86\ISO\sources” folder and renamed because it’s assumed that it will be customized. A person like I said may want to add programs, scripts, drivers, and graphics. Graphics like editing the background image of Windows PE.
CUSTOMIZING WINDOWS PE
I like to use the compression program 7-ZIP to open .wim archives and view and modify the contents of them. For example, if we open the “winpe.wim” image and navigate to “Windows\System32\winpe.bmp” that’s the background image of Windows PE.
If we wanted to change that we could by removing the “winpe.bmp” file and placing our own image in the same directory with the same name and file type.
Once we are done modifying the “winpe.wim” image to our liking, we can copy it to the “winpe_x86\ISO\sources” folder and rename it to “boot.wim”. Now we must create an ISO image of the contents in the “winpe_x86\ISO” folder.
GENERATE A BOOTABLE ISO
There are many programs out there that can take files and create an ISO image of them, one of them is “ImgBurn”, however I am a fan of getting the job done without additional software.
Luckily, Windows 7 AIK gives a program called “Oscdimg.exe” located in the “C:\Program Files\Windows AIK\Tools” directory and under each folder name that is of the three architecture types like “x86”, “amd64”, and “ia64”. Once we navigate to the location of the “Oscdimg.exe” program in Command Prompt we must specify a couple arguments. At this point it’s helpful to view the following link:
Please review: Oscdimg Command-Line Options
In order for me to create an ISO image of the contents in my “winpe_x86\ISO” folder, this is the command I need to run:
Oscdimg.exe -bC:\TEMP\winpe_x86\ISO\boot\etfsboot.com -p00 -u1 -udfver102 C:\TEMP\winpe_x86\ISO C:\TEMP\winpe_x86.isoHere I am giving the “Oscdimg.exe” program the “-b” argument and giving it the location of the Boot Sector File. Then I am using “-p” and specifying a platform ID of “00” for a BIOS system, you would use “EF” for a UEFI system. And when using “-b” for a UEFI system you want to point to the “efisys.bin” Boot Sector File instead of the “etfsboot.com” one.
I noticed that “efisys.bin” is not in my “winpe_x86” folder, that’s because Windows 7 x86 does not support UEFI.
Then with “-u1” and “-udfver102” I am specifying what UDF filesystem and version I desire. Lastly, I point to the directory of the files I want in the ISO image and where I want the destination of the ISO image to be, in this case it’s called “winpe_x86.iso” located in the “C:\TEMP” folder.
CONCLUSION
Well, that’s it, now you have a bootable Windows PE ISO image base on Windows 7’s core, and you can burn it to a CD/DVD and boot it on a PC, or with other various programs you can write it to a USB drive and boot from that.
Windows PE can also be accessed with a Window 7 installation disc using the recovery options. With these method in this article, you can customize Windows 7 PE with drivers and other things for your troubleshooting needs.
Hey folks, my name is Dex and you’ve landed on my website. Ponder this; was it by coincidence or did God bring you here? Either way, I hope you find something of value. We may not agree on everything, but that’s just part of the fun here!
It’s my hope here that you also become inspired to join the good fight against evil. There are no ads here, just truth bombs. So change your tune because the best is yet to come, and nothing can stop what’s coming!
John 3:16: For God so loved the world that he gave his one and only Son, that whoever believes in him shall not perish but have eternal life.
Leave a Reply
Want to join the discussion?Feel free to contribute!