 flaticon.com
Automating Startup of Programs Requiring UAC
Table of Contents
INTRO

This will be a short guide on how to automate the login of a non-administrative user account in Windows while also launching a program at startup after login that would normally require a UAC prompt or user interaction to run. While this guide will not cover all the tricks in the book, it will get you started on working to automate some of your programs that you want running automatically that maybe will not do so without user interaction. The goal is to reduce generated tickets for simple requests.
ALIBI WITNESS | VIGILANT CMS AUTO START
For this guide and for my example I will be installing Alibi Witness CMS V4.0. This is software that interfaces with an Alibi Witness NVR so users can view live camera feeds, playback or export previously recorded footage. Some clients use large flat-screen TVs mounted on walls to view live camera feeds, and they just want their camera views to be displayed on the TVs.
We found a great solution was to install the MeLE stick PC directly on the back of the TV connected to Wi-Fi (LAN is an option also), and with our RMM agent installed we can adjust if needed remotely. With the following guide, we have had no calls or tickets in months regarding the user having issues viewing the cameras or getting things going again.
Be sure to enable Wake-on-LAN (WoL) and/or WoWLAN, AC power recovery in the BIOS, and configure Windows to restart after system failure so that in the event of power failure or the occasional Windows BSOD the stick PC boots back up without user intervention.
GETTING STARTED
- Please download and install Alibi Witness CMS V4.0 Software for Windows.
- Download here:
The majority of these steps also apply to Alibi’s Vigilant CMS software, see my notes in the guide regarding Vigilant CMS.
- Please download and install Alibi Vigilant CMS Software for Windows.
- Download here:
While this guide focuses on using tricks within Windows to automate software, those searching for Alibi CMS automation will find this guide helpful so it’s a dual-purposed post.
CONFIGURE WINDOWS AUTO LOGON
Note: This step is not needed for Alibi Vigilant CMS as the software has a built-in menu to accomplish this by the following below.
- System Configuration -> System -> Startup
- Enable Auto Login to Windows: Checked
- Insert creds for Standard user account you’re using or will use.
Continuing on with Witness CMS.
- Create and configure a non-administrative user account called “Alibi” with a password of your choice.
- Remember this is for a display kiosk.
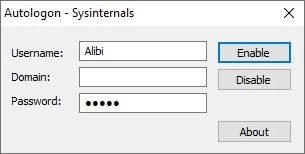
- Download Autologon from Microsoft’s Sysinternals suite, here.
- Add the information for the Windows Alibi account you created earlier.
INSTALLING WITNESS CMS
Now let’s install the Alibi Witness CMS software. You may need to invoke administrator credentials to do this.
- Please check all options during the installation prompts.
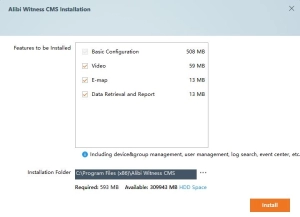
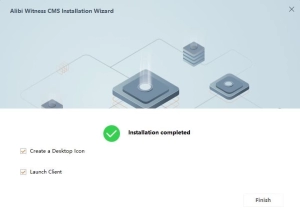
- Verify the installation is successful.
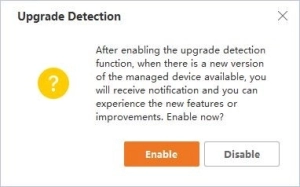
- When prompted, disable upgrade detection.
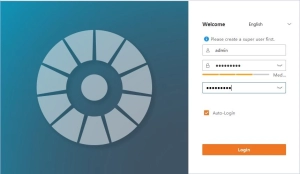
- Create the super user:
- Username: admin
- Password: {whatever you desire}
- Auto-Login: Checked
- Note: This is for the auto-login of the CMS software, not the Windows user login.
- Note: For Vigilant CMS there are default credentials.
- Username: admin
- Password: 123456
- System Configuration -> System -> Startup
- Enable Auto Login to Alibi Vigilant CMS: Checked
- System Configuration -> System -> Startup
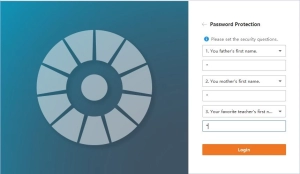
- Set the security questions:
- Use an “*” for the answer to the 3 initial questions.
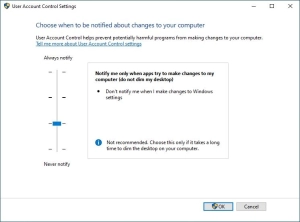
- Modify the Windows UAC level.
- Set to level 2.
REGISTRY IMPORT – RUNASINVOKER
- Using the below Windows Registry Editor block, save it into a notepad file and save as “alibi-witness-vigilant-uac-fix.reg” (will need to have shown File Extensions enabled so you’re not saving the file as “.reg.txt”) and import into the Windows registry.
- This prevents UAC from prompting on run for the Alibi software for both Witness CMS and Vigilant CMS.
Windows Registry Editor Version 5.00

[HKEY_CURRENT_USER\Software\Microsoft\Windows NT\CurrentVersion\AppCompatFlags\Layers]
"C:\\Program Files\\Alibi Vigilant CMS\\Alibi Vigilant CMS.exe"="~ RUNASINVOKER"
"C:\\Program Files (x86)\\Alibi Witness CMS\\Alibi Witness CMS Client\\Client\\Alibi Witness CMS.Framework.C.exe"="~ RUNASINVOKER"
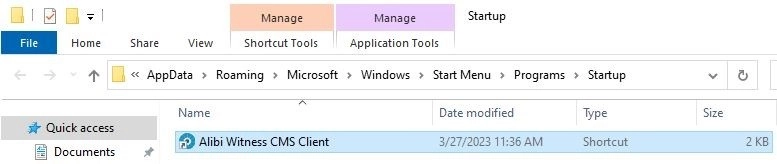
- Add Alibi Witness CMS Client shortcut to Startup folder.
- C:\Users\%username%\AppData\Roaming\Microsoft\Windows\Start Menu\Programs\Startup
- A shortcut to get there is to open the Run dialog box in Windows and type: shell:startup
- C:\Users\%username%\AppData\Roaming\Microsoft\Windows\Start Menu\Programs\Startup
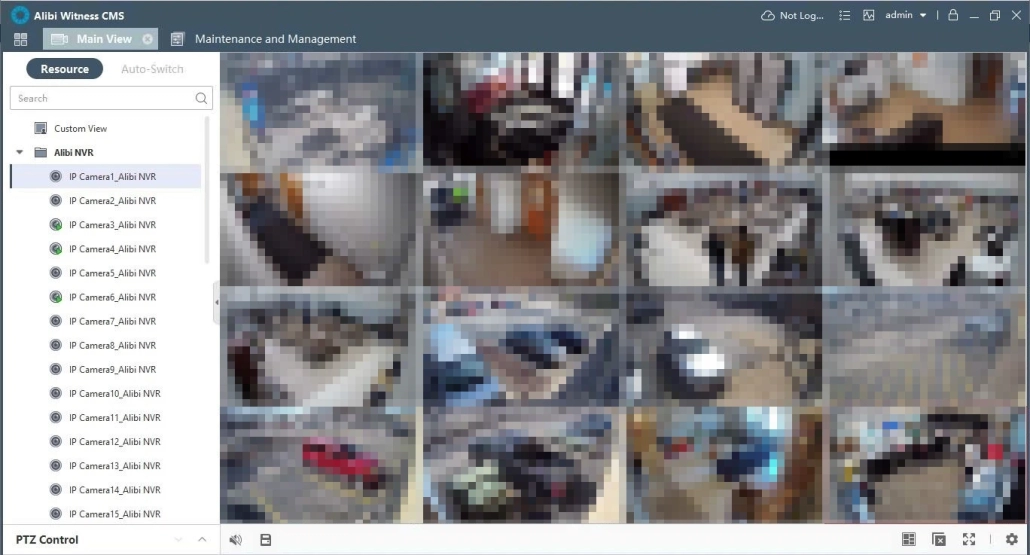
- Add the NVR and configure the Main View windows with the cameras they need. The software will remember the last view loaded to Main View.
FINISHING UP
- Verify everything works and comes up automatically from a restart.
The camera views can be taxing on the GPU and especially on the MeLE stick PC. We found going into Group Policy and disabling all Windows data gathering and telemetry settings reduced CPU and RAM usage by about 30%. Make sure camera streams are set to sub-stream for each camera in the Live View window.
Additionally disable Windows transparency effects, use the Windows Run dialog box to open systempropertiesperformance.exe and set the Visual Effects to best performance, and set the Power Profile to high performance.
ADDITIONAL TIPS
If you’re still having issues, maybe that the user account still needs administrative rights to run the software then you need dive a little deeper. You need to look at the following areas in Windows regarding your software.
- File System Permissions
The software you installed will usually have folders in the some or all of the following locations:
- C:\Program Files (x86)
- C:\Program Files (x86)\Common Files
- C:\Program Files
- C:\Program Files\Common Files
- C:\ProgramData
- C:\Users\%username%\AppData\Local
- C:\Users\%username%\AppData\LocalLow
- C:\Users\%username%\AppData\Romaing
- C:\
These directories you will need to look for folders within them that are attributed to your software and make sure your user account has Modify or Full permissions to them. Also, you can use Process Monitor from Sysinternals to see what other directories your software might be accessing requiring it to work.
- Registry Permissions
The Registry is another area you will need to look into for your software’s registry keys and make sure your user account has Full permissions to them. Utilize the program RegFromApp to monitor the Registry Keys a process modifies. Sometimes programs run in 32-bit mode, so you need to use both the 32-bit and 64-bit versions sometimes to find the process in question. One of my most treasured tools in my collection for automation and seeing what toggling some settings really does.
Start in the following locations:
- HKEY_LOCAL_MACHINE\SOFTWARE
- HKEY_LOCAL_MACHINE\SOFTWARE\WOW6432Node
- HKEY_CURRENT_USER\SOFTWARE
- HKEY_CURRENT_USER\SOFTWARE\Wow6432Node
- Services
Your software may use services that can only be run with certain permissions. You may have to modify the service or disable it and re-create one using Microsoft’s built-in Sc commands or third-party tools, one for example called NSSM.
If none of this works then it’s possible it can’t be done, or maybe it runs but is semi-broken. In which case, it will be up to you to solve the challenge or move one with a different angle or software.
CONCLUSION
Well, that’s about it, hopefully this guide got you going in the right direction. Automating things is fun once you figure out the tricks but sometimes there are challenges with no solutions so always give it your best shot!
Hey folks, my name is Dex and you’ve landed on my website. Ponder this; was it by coincidence or did God bring you here? Either way, I hope you find something of value. We may not agree on everything, but that’s just part of the fun here!
It’s my hope here that you also become inspired to join the good fight against evil. There are no ads here, just truth bombs. So change your tune because the best is yet to come, and nothing can stop what’s coming!
John 3:16: For God so loved the world that he gave his one and only Son, that whoever believes in him shall not perish but have eternal life.
Leave a Reply
Want to join the discussion?Feel free to contribute!